
We Also Dispel the 11 Lame Excuses For Not Rocking Them
Love curly hair but tired of all the time it takes to achieve the look?
Worried about what all that curling or flat iron heat is doing to your strands? Knowing that the last thing you need is to heap heat damage on hair you are trying to grow out.
Yeah I get it. Curls – they don’t come easy.
The good news is there is an easy heatless solution.

The bad news is many who try it do it wrong. It’s almost like they are working with two hands tied behind their back.
Or worse, they don’t even try at all limited by their misconceptions. Or thinking it’s not for them because their hair isn’t long enough, it’s too thick, too straight, too short, too something.
Talk about stinkin’ thinkin’.
So much like we looked at how to better define curly hair by plopping, let’s look at how headband curls can bring wavy curls to life for those with straight hair.
Oh and after you done here you might want to check out another heatless approach we wrote about that’s sweeping the internet and that’s robe belt curls. It’s a game changer. As may be our look at DIY no heat straw curls. But I digress.
Now headband curls let you produce gorgeous fairy princess hair on demand as predictably as knowing a rousing chorus of Auld Lang Syne will break out at the stroke of midnight on New Year’s Eve.
What Are Headband Curls?
This is a method for producing curly hair by wrapping sections of hair around a headband.
Headband Curls Step By Step
Knowing that if a picture is worth a 1000 words then a demonstration video must be worth just that much more. Here you go.
What You’ll Need
- two fabric headbands for extra grip
- spray bottle of water
- hair spray
- some kind of texturizer – clay, cream or spray powder
Here’s How To Curl Your Hair With A Headband
Step 1) Divide your hair into two sections.
Step 2) Brush through to smooth and detangle.
Step 3) Stretch the headbands around the crown of your head – note that unlike every other video I watched she doesn’t pull it down across her forehead – the point of this will make more sense when you read the mistakes commonly made below.
If you notice any poufy hair around the crown now’s the time to just slide the strands down under the head band so your topmost hair lies relatively flat.
Step 4) Spritz your hair with water from the ears down to dampen it making sure you work the water throughout the hair as evenly as you can.
Step 5) Exclude your bangs. Twist the strand entire strand and wrap it around the headband.
This differs from other approaches that suggest you start with a smaller section, wrap and grab another section of hair much like you would a braid and wrapping that (which you can also try).
Also note that she is only wrapping on the headband towards the back of her head.
Some complain they don’t have enough room on the headband for all their hair.
She has room to spare actually using only half the available headband real estate. But that’s likely because she is using two strands of hair – not starting with a smaller strand, wrapping it, adding more, wrapping it … well you get the idea.
Another interesting twist … after each time she wraps the hair around the head band she twists the remaining strand again before wrapping. All this twisting helps to make it easier to wrap the hair around.
Step 6) After all the hair is wrapped she douses the wrapped hair with hairspray. This is a great idea for those looking to help the curl stay put.
What happens next depends on how big of a hurry you are in. Keeping in mind that with this technique usually the longer your hair is “on the band” the more voluminous and defined the cascade of curls produced will be. So you options await behind three doors.
- Behind Door #1: You could sleep on it and wake up to beautiful waves.
- Behind Door #2: You could let things air dry while you go about your morning prep.
- Behind Door #3: You could set your blow dryer to the COOL setting or at most warm and use that to speed up the drying process.
Whichever option you select test your hair to insure it’s dry before the unwrapping begins.
Then slowly unwrap the hair from the head band.
Note she just didn’t yank the headband off her head and hope for the best as she struggled to extract it from her mane.
This bears some looking into since so many get it WRONG!
What To Know When It Comes To Taking The Head band Out
- Separating your hair from the band the right way is critical. Many get in a hurry and end up frustrated and facing a frizzed up mess. Some even have to resort to cutting the head band out. You don’t want that.
- What you do want is to reverse the process. That means you want to s-l-o-w-l-y and carefully unwrap the sections of hair from the head band.
- Another trick is to use a Bic pen or a pencil or something like that to pry your hair off the band one wrap at a time. This offers an additional benefit of cutting down on frizziness too since your fingers aren’t touching your strands.
There’s not a lot of styling involved. Once unwrapped you’ll be left with two large curled sections. Finger comb them to break and loosen them up.
To complete add your texturizer of choice. Less is usually more and eliminates any chance of your hair going all “Danny from the movie Grease” on you. (As you know you’ll add this product by first emulsifying it between your palms then scrunching it into your waves.)
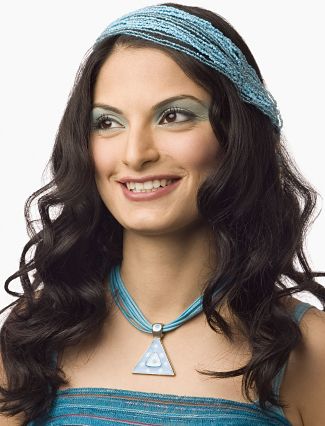
What Do the Curls Look Like
The resulting curls look like any other curls you’ve slaved over for hours with your curling iron.
Awesome. Only no slaving over involved!
Oh and don’t be surprised if some of your friends ask what kind of curling iron you used they’ll look so good.
Two Surprising Ways To Make Headband Curls Last
There are two things that most commonly affect how long these last. Put another way, there are two pitfalls that can thwart your most desired outcome – long lasting, vibrant curls.
First you may think that wrapping up wet hair and sleeping on it will produce the best results. Not the case.
Problem is if your hair doesn’t dry overnight, and odds are if it starts out wet it will be still at least damp when the alarm sounds, the curls will fall shortly after removing the headband.
The other problem is failing to use product. Well, the right product.
A head band isn’t a miracle worker.
Yes it can produce lovely curls or waves.
But your hair is unlikely to hold the curl without help.
Products to Make Head Tie Curls Hold Up
Texturing spray may be your product of choice and that would be a good choice. It can add volume, body and hold.
Yet there are all sorts of product opportunities here that can lead a hand when it comes to extending the life of your curls.
Like for instance a few spritzes of a lightweight salt spray used in the dampening process used in concert with water. Or maybe scrunched in after release for texture and added hold.
Another product to scrunch in would be styling mousse. You may find this helps your mane hold the curl better than hair spray.
Yet another way to lock in the curls would be a spray bottle filled with a mix of water and leave in conditioner
Others find some kind of curl cream to help more with the hold.
But using the right product doesn’t mean you’re home free. Not if you’re guilty of these
11 Lame Excuses That Will Sabotage Your Efforts

From reading why some say this won’t or doesn’t work you can’t help but think they give up on this technique after the first try.
Instead of embracing the opportunity to experiment they whine about how this can’t work for them for any number of reasons. Actually, there are lots of things you can tweak to see if you can’t produce the results seen in the videos.
So to dispel all that negativity, here’s are some of the more common excuses that may stand between you and success. For example …
The Excuse: My hair is too thick or there isn’t enough space for it all on the headband.
How to Own It: Actually those with thicker hair can do this. All it takes it trying not to wrap your hair as tightly so more hair is “consumed” with each wrapping. That should leave plenty of space on the band for all your hair.
The Excuse: I don’t have the right sized headband.
How to Own It: The size of the headband matters some.
Obviously a thicker one will mean you can’t wrap the hair as tightly so you would expect it to produce more beachy like waves.
Where a smaller band will let you wrap real tight and that puts you on the way to Shirley Temple like tight coils.
Finding one at least an inch thick, with two inches being even better should be your plan.
Another thing to remember about the width. The damper the hair the wider the band you’ll want to use as that gives more surface area for evaporation.

The Excuse: Okay but you can only produce tightly coiled curls.
How to Own It: You’re right. The size of the curls depends on the size of the section you wrap.
If like in the video you keep the hair in one giant section you’ll produce wavy hair. Some recommend starting with a one inch section of hair and grabbing more after each wrap. That gives you more curls.
As a rule smaller sections equals more curls, tighter curls. Wrapping more hair loosely produces a wavier outcome.
The Excuse: There’s this tail that just wants to hang there in the back when I’m almost done.
How to Own It: Tuck and pin would be your next move here. That is tuck that last little bit that is hard to wrap under and pin it in place with a bobby pin or two.
The Excuse: If you toss and turn a lot at night this won’t work as the headband will come off.
How to Own It: The simple solution again is bobby pins.
If you find the headband is sliding off your head attach it firmly in place with several strategically places pins.
The Excuse: Yeah but I tried this with wet hair and the curls fell immediately.
How to Own It: If you have like 24 hours for your hair to dry maybe this wet head approach would work. But you’re better off working with slightly damp hair so the curls set.
If your hair is dry but you want to make it damp there’s always your trusty spray bottle. Or you might run a little water on your brush and run that through your locks.
The Excuse: If I don’t have a fabric headband I can’t try this.
How to Own It: C’mon now. Get a little creative.
A bandana will work. As might a thin knee sock tied in the back. You might even cut the sleeve off an old stretchy t-shirt and use that as a stand in headband.
The Excuse: Wait, I can’t go out with a headband crease across my forehead.
How to Own It: If you run the headband across your forehead, yes, you may will wake up to a red line staring you in the face.
The first fix is to place the band higher up so it is situated more on the crown just like in the video. This is by far the best fix and the one most likely to let you avoid the problem in the first place.
The next fix would be using a softer stretchier headband.
A final fix would be to try sticking a tissue, a bit of fabric, even a worn out footie between the elastic headband and your forehead.
The Excuse: I’ve heard heatless curls always lead to frizzy hair.
How to Own It: If this is a problem for you try working in a touch of argon oil into your hair to tame that frizz. Or maybe some leave in conditioner if there’s no argon oil in sight.
The Excuse: Seems this only works with medium to long hair.
How to Own It: This may actually work BETTER if your hair is shorter.
Why?
Because the hair dries faster (like in 30 minutes faster) making it a styling move you can accomplish during your morning routine.

The Excuse: How does anyone sleep in this?
How to Own It: Another all too common misconception is that this is uncomfortable to sleep in. But not really. At least not for most.
For sure it’s no more so than sleeping on rollers or sock curls and probably much easier actually. Especially if you have a stretchy fabric headband then you shouldn’t have any problems catching Zs.
The Excuse: Tried to yank the headband out – epic fail.
How to Own It: I agree that yanking seldom turns out well. That not only makes it a mistake but a big blunder that ranks up there with anything the Kardashians pull. Yet some still insist on taking this ill-advised shortcut all the time.
Result? A tangled mess at best. Something akin to Medusa at worst.
The trick is you have to undo the wrapping just like you did it. Start at the back of your head and patiently take out each section one at a time.
Do this and don’t be surprised to see this method totally works to produce amazing curls.
Quick Check: If your hair comes out basically in one section as in the video good job!
If you’re the impatient sort maybe a headband that ties is more your speed. Then you can untie it and carefully slide it out of your hair.
Is It True that You Can Microwave Your Way to Sexy Curls?
Could be.
Ran across a microwaveable hair band and a video that shows it in action. Sure it’s a little weird but thought it could be helpful.
I don’t think this vid showed this little tool at its best because the person from Refinery29 didn’t seem too familiar with even the basics here.
So I’m not saying this is the best demonstration possible. But it does show it if worked for her it might work that much better if you’ve got a better idea how to do this.
And no, this doesn’t violate the heatless curls vibe we’re trying to maintain here.
Plus it is kinda cute.
The product is called SoCal Curls. And if you want to check it out further here’s here’s the link where you can.
Is this the curl maker you didn’t know you needed? Can’t say. But don’t blame me if you fall in love with it!

The Style Beyond the Style?
Also saw where someone said with their dark hair wrapped around the headband they kinda resembled Snow White.
True or not maybe this “hair wrapped around a headband” look is too adorable to not wear out too? Provided of course you can find a super cute headband or scarf.
So it might just be an idea to consider, don’t you think?
For those looking for even more hairstyling flexibility what’s to keep you from using this wrapped up look as your hairstyle during the day? Then easily morph it into beautiful curls for the evening.
That would, in some ways be like Cinderella, only in reverse almost.
Anyway so what’s not to like here?
This method is really easy.
It’s faster than having to break out the curling iron.
Does no heat damage.
Produces a head full of curly hair that looks romantic, elegant, and voluminous all at the same time.
Okay so maybe this idea isn’t as good as free tickets to a Bruno Mars concert. But concerts come and go. Master this and you can turn to it over and over whenever you need to effortlessly rev up your style forever.

Please follow our popular pins board on Pinterest for even more ways to achieve effortless beauty like this.

The only excuse I didn’t see addressed is the top of your head being flat. I imagine the solution is to put a few loose pin curls on top if you don’t want that flat look.
Exactly. Or a few clips to get some lift at the crown.
I do this! I have relaxed hair that holds styles well, so i don’t usually use hairspray. At most just a couple pumps of serum to keep it smooth and frizz free but that’s it. I don’t even need pins. It has really reduced the amount of heat I put on my hair. It is a game changer.
Great to hear this works so well for you. Hopefully it will encourage others to give this a go. Thanks so much for sharing, Kay!