
Are you putting your hair into a ponytail all the time because you don’t know what else to do with it?
Tried Dutch braids before but did things always end up worse than an epic fail for some reason?
Maybe you’re frustrated with braiding because you’re all thumbs to put it mildly?
Can feel your pain, girlfriend.

But the totally beginner friendly video tutorials below are just the painkiller you need.
For real. They take you by the hand and walk you through this braid step by step because your hair deserves better, right?
After watching, and yeah admittedly with a little practice, you’ll know exactly where to place your hands and fingers. Given that’s more than half the battle with braiding you’ll be able to easily braid up your hair whenever you want.
So you got this.
Only Two Simple Things You Need to Remember
(I Swear)
With these braids there are two vitally important but simple things to never lose sight of. Because there are only two things you need to know about Dutch braids. They are:
- You are braiding UNDER rather than OVER like a French braid. That’s really the only difference.
- Then every time an outside strand goes UNDER just add hair to it first, smooth as needed, then finish crossing it UNDER and into the middle.
See? Just two things. I told you this wasn’t all that tough.
Since those are the only two keys to success let me repeat them two different ways so they sink in. Because getting this is often a matter of simply not psyching ourselves out into thinking we can’t get it.
So yeah. I’d guess this one is about hundred times easier than you think it is.
Now to emphasize the going “under-into-the-middle” part of the routine here’s three minutes of a tutorial that does just that.
As you can see this video patiently reinforces the under and into the middle bit over and over. So that in three minutes even the most braiding-challenged should be able to get it.
- Take the top strand, grab some hair and bring that under and into the middle.
- Take the bottom strand, grab some hair, and bring that under and into the middle.
Don’t’ be afraid to watch those three minutes a couple of times if you need to. After that someone should be able to wake you up at 2:00 AM and you should be able to recite that braiding mantra no without thinking.
But maybe you don’t like top strand and bottom strand. This time let’s call those three more or less same sized strands the front, middle and back.
To start the braid
- Take the front strand UNDER the middle one which makes the front the new middle.
- Then the back strand goes UNDER the new middle replacing it as the newest middle section.
- Each time you take a strand UNDER simply grab another section of hair to weave into your braid.
All you do is repeat that same crossing under process as you braid up your mane.
Before you know it, you’re done!
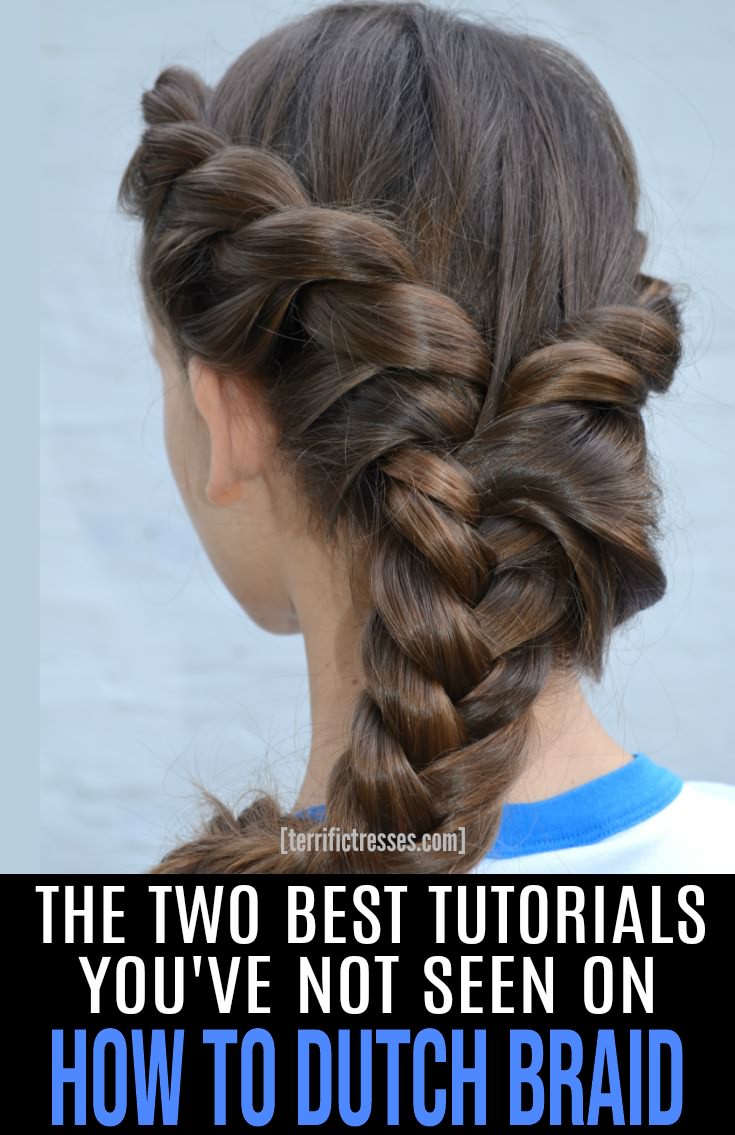
Do it right and you’ll end up with a look that pops with 3D braided depth built naturally into the style.
Can you see why some say it’s an inside out French braid?
Now for the second video tutorial which will reinforce those two points perfectly. (You do remember them, right?)
Five minutes from now you’ll know why…
- As stated in the vid (I can’t take credit for this) with Dutch braids you want to think limbo rather than leap frog – that reference will make more sense in a sec.
- You want to first get the big picture.
- Then you can move on to the details because the devil’s always in the details, isn’t it?
After watching this you WILL know how to take control of this hairstyle with the super simple technique shared.
Which in turn will make this braid super simple for you. So much so you’ll wonder what all the fuss was about.
Video Tutorial: How to Double Dutch Braid
Of course having mastered the UNDER thing you may want to take your braiding up a notch or two. To help here’s your …
Cheat Sheet with At Least 11 Things To Remember – They Might Be Important
When first learning this just keep reminding yourself you are weaving the outside strands UNDER the middle one each time and you’ll get it in no time. Promise.
Secondly, for a result that looks nice and uniform try to add about the same sized chunk of hair each time. Doesn’t matter whether it’s fatter or skinny, just be consistent with how much hair you’re adding.
That said don’t get too ambitious with the amount of new hair you’re working into the style – especially at first. That’s because you may find it harder to hold bigger sections of hair together. Remember you’ve only got two hands.
Fourth point? To keep things tight it’s best to keep your hands moving along close to your scalp.
Then to bulk things up when finished it’s time to “pancake” your plait. All that means is you want to gently spread the braid out to make each loop look wider, fuller and slightly undone. (Check out our how to pancake braids tutorial if you need help.)
Of course one trick with pancaking is to start at the top and patiently work your way down to the end of the braid. In some, okay most, cases it may be best not to braid to the very end leaving some hair unbraided to pull into the style. That way you can pancake to your heart’s content without tempting the braid to fall out.
The seventh item on our list puts girls with layers on notice. Because as you’d expect, this braided style usually works best if your hair isn’t layered. Or at the least you’ve got longer layers that will tend to behave themselves and stay braided. Yeah a bit of a downer but everything can’t be unicorns and rainbows.
Yet somewhat surprisingly, as has been pointed out in this post about braiding short hair, a braid like this works just fine with shorter strands as examples 7 and 12 prove.
Not surprisingly, any braided style like this is perfect for flaunting your mane on those dirty hair days where you were desperate to hide the fact. In fact it’s the perfect hairstyle for second or even third day hair.
However if you’re dealing with freshly shampooed or ultra fine silky soft strands create your own second day hair with dry shampoo to give the plaits some grip and better hold-ability. For those keeping track, that’s item number ten on our cheat sheet.
If you care to show off you can do two or three of these, using smaller sections of hair obviously so you have a tighter outcome, all on one side. Doing so just because you can, you know?
I know you don’t want to hear this but braiding comes down to practice. Yes your arms will feel like they’re going to fall off. But if you keep at it you will master this sooner than you think.
Finally some find learning to do a braid like this without looking in the mirror helps a lot. The mirror image just confuses things.
Seems like that is more than 11 points, so we good?
Just watch out. If you aren’t careful you’ll end up with a look that would make any of the Kardashian clan envious. Or at least the best braids of your life. With a style that literally pops off your head.

By the way, if you could some more braiding inspo why not follow our braided hairstyles board on Pinterest where we share all kinds of exciting styling ideas?
Leave a Reply